![[CESCG logo]](../../CESCG/images/cescg98.small.gif)
Juraj Sofranko
juraj.sofranko@st.fmph.uniba.skFaculty of Mathematics and Physics
University of Comenius
Bratislava, Slovakia
![[CESCG logo]](../../CESCG/images/cescg.small.gif)
|
|
Virtual Reality Modeling Language version 2
Juraj Sofranko juraj.sofranko@st.fmph.uniba.skFaculty of Mathematics and Physics University of Comenius Bratislava, Slovakia |
|
The Virtual Reality Modeling Language (VRML) is the tool for creating 3D virtual worlds on the World Wide Web. Even though it is in its infancy VRML allows you to realize your visions of the virtual worlds and make them available to everyone on the Web. The specification defines VRML version 2.0 aims to capture recommended practice and such to be used as a replacement for VRML 1.0.
Keywords: Anchors, Appearance, Lights, Material, Nodes, Sound, Transformation
1. Introduction to VRML
1. 1 History of VRML
The origins of the VRML date back to the middle of 1994, to European Web conference in which Tim Berners Lee (father of the WWW and HTML) was talking about the need for a 3D Web standard. He coined the name VRML (Virtual Reality markup Language) as an acronym to HTML (HyperText markup Language). The name has quickly changed to Virtual Reality Modeling Language.
VRML was based on the Inventor file format form Silicon Graphic Incorporated. It was VRML 1.0. A small extension to VRML, called VRML 1.1. It contained facilities to add audio clips to a scene and some very primitive animation. But because it was not enough to create compelling content VRML 1.1 never saw the light of day.
1. 2 The Requirements for VRML 2
SGI and their engineer Gavin Bell, responsible for introducing the VRML community to Inventor, conceived of three requirements for VRML 2:
1. Composability
Composability allows an author to create a city. Scale it down and place it on the table like a model. This table can be placed in a building and building on a planet.
Scalability allows worlds of arbitrary size to be created. You can be able to see a galaxy, zoom in on one planet, then a city, a statue and a bird sitting on head of this statue. This is difficult due to limits in the precision of computer hardware.
Extensibility allows author to extend the capability of the language for special purposes. Author can create some new geometric object or multiusers worlds.
The release of VRML 2 specification was announced at Siggraph `96.
2. Basic VRML Objects
2. 1. Nodes
Nodes in VRML are some function units. The name of node indicates its basic function (like Sphere, Cube, and Transform). Nodes contain a list of fields, which holds values that define parameters for its function. For example
Cone {
  field  SFFloat  bottomRadius  1
  field  SFFloat  height        2
  field  SFBool   side          TRUE
  field  SFBool   bottom        TRUE
}
field in Cone node defines height of cone. Some words in example are in bold. I put them to bold, because they can be actually typed to the VRML file. Every field in VRML has default value. In example it was 1 for bottomRadius and 2 for height. If you do not enter any vale in the field it will use the default value for that field. (All lengths in VRML are in meters and angles are in radians.)
2.2 Shapes, Appearance, Material and Geometry
Creating VRML file only with a Cone node will not do anything. Because you specified only geometry, not its appearance. You can do this in node Shape.
Shape {
  exposedField  SFNode  appearance  NULL
  exposedField  SFNode  material    NULL
}
The simplest VRML scene cans looks like this:
#VRML V2.0 utf8
Shape {
  geometry Cone { }
}
The Appearance node holds all information to the look of the object.
Appearance {
  exposedField  SFNode  material          NULL
  exposedField  SFNode  texture           NULL
  exposedField  SFNode  textureTransform  NULL
}
The material field holds a Material node. It holds information about what color to make an object. Other two fields hold information about images that can be wrapped on or around the object. All fields in Material node are related to the color of the object.
Material {
  exposedField  SFFloat  ambientIntensity  0.2
  exposedField  SFColor  diffuseColor      0.8 0.8 0.8
  exposedField  SFColor  emissiveColor     0 0 0
  exposedField  SFFloat  shininess         0.2
  exposedField  SFColor  specularColor     0 0 0
  exposedField  SFFloat  transparency      0
}
Let’s extend our example:
#VRML V2.0 utf8
Shape {
  appearance Appearance {
    material Material {
      diffuseColor 1 0 0
    }
  }
  geometry Cone { }
}
2.3 The VRML File Format
As you can see in present examples both start with the same line.
#VRML V2.0 utf8
This line is called VRML header line. Every VRML file must start with one. What does it mean?
# - is actually a sign for comments. If you want write comments to a VRML file you have to write this sign.
VRML V2.0 – means that file is in VRML format in version 2.0
utf8 – signs that text in file is in utf8 encoding standard. Utf8 is an ISO standard that allows characters in file to be read by a text editor. It’s UNICODE standard.
2.4 Field Data Types
In next table you can find all VRML data field types. Fields that can hold only single value start with SF (Single value Field). Fields which start with MF (Multiple value Field) can holds an array of values. Many SF field types have a corresponding MF field type.
| Type | Description |
|---|---|
| SFBool | The Boolean value TRUE or FALSE. |
| SFFloat | A 32-bit floating point value. |
| SFInt32 | A 32-bit signed integer. |
| SFTime | An absolute or relative time value. |
| SFVec2f | A pair of floating point values usually denoted as u, v because they are most often used to represent texture coordinates. |
| SFVec3f | Three floating point values usually denoted as x, y, z because they are most often used to represent a 3D position. |
| SFColor | Three floating point values, each between zero and one, representing the red, green, and blue components of a color. |
| SFRotation | Four floating points value. The first three values represent an axis (with 0,0,0 being the other point on the axis line) and the fourth value represents the angle of rotation in radians around that axis. |
| SFImage | A two-dimensional image with one to four color components, allowing representation of monochrome to full-color images with transparency. |
| SFString | A UTF8 (international character) string. |
| SFNode | A container for a VRML node. |
| MFFloat | An array of SFFloat values. |
| MFInt32 | An array of SFInt32 values. |
| MFVec2f | An array of SFVec2f values. |
| MFVec3f | An array of SFVec3f values. |
| MFColor | An array of SFColor values. |
| MFRotation | An array of SFRotation values. |
| MFString | An array of SFString values. |
2.5 Transformation
VRML use a World Coordinate System. Positive part of axis X goes to the right, positive part of Y goes up and positive part of Z goes toward to you. To move, scale or rotate shapes is used the Transform node.
Transform {
  eventIn       MFNode      addChildren
  eventIn       MFNode      removeChildren
  exposedField  SFVec3f     center            0 0 0
  exposedField  MFNode      children          []
  exposedField  SFRotation  rotation          0 0 1  0
  exposedField  SFVec3f     scale             1 1 1
  exposedField  SFRotation  scaleOrientation  0 0 1  0
  exposedField  SFVec3f     translation       0 0 0
  field         SFVec3f     bboxCenter        0 0 0
  field         SFVec3f     bboxSize          -1 –1 –1
}
To children field you have to put all shapes which will be changed. If there will be only one shape you do not have to use the brackets. First three numbers in rotation field determinate axis of rotation and fourth number angle of rotation (in radians). Center field sets a point through the axis of rotation goes. ScaleOrientation field determinates the axis along the object scales.
2.6 Basic Geometric Primitives
Except the Cone has VRML three more basic geometric primitives: Box, Sphere and Cylinder. Here are their definitions:
Box {
  field  SFVec3f  size  2 2 2
}


Sphere {
  field  SFFloat  radius  1
}


Cylinder {
  field  SFBool   bottom  TRUE
  field  SFFloat  height  2
  field  SFFloat  radius  1
  field  SFBool   side    TRUE
  field  SFBool   top     TRUE
}
3. Building Complex Objects
3.1 The IndexedFaceSet
VRML allows you define patches of flat surfaces. Two rules govern the definition of these faces. First, all the points of the patch must be coplanar. If they don’t, some of browsers will render them wrong and some of them doesn’t render them at all. Second rule is that surfaces should be convex. They don’t have to, but rendering a non-convex patches is much expensive then convex.
IndexedFaceSet {
  eventIn       MFInt32  set_color Index
  eventIn       MFInt32  set_coordIndex
  eventIn       MFInt32  set_normalIndex
  eventIn       MFInt32  set_texCoordIndex
  exposedField  SFNode   color              NULL
  exposedField  SFNode   coord              NULL
  exposedField  SFNode   normal             NULL
  exposedField  SFNode   texCoord           NULL
  field         SFBool   ccw                TRUE
  field         MFInt32  colorIndex         []
  field         SFBool   colorPerVertex     TRUE
  field         SFBool   convex             TRUE
  field         MFInt32  coordIndex         []
  field         SFFloat  creaseAngle        0
  field         MFInt32  normalIndex        []
  field         SFBool   normalPerVertex    TRUE
  field         SFBool   solid              TRUE
  field         MFInt32  texCoordIndex      []
}

Coordinate {
  exposedField  MFVec3f  point []
}
Here is the simple example of IndexedFaceSet. It is a square.

Shape {
  geometry IndexedFaceSet {
    coord Coordinate {
      point [ 0 0 0, 1 1 0, 1 0 0, 0 1 0]
    }
  coordIndex [ 0, 2, 1, 3, -1]
  }
}
The Coordinate node holds four points. They are not in right order. The ordering is given in the coordIndex field containing the sequence in which the points should be connected. Each value of coordIndex is an index into a list of coordinate points. The last value is –1, which indicates the end of surface. The –1 is not necessary in cases, when face ends with last index in field.
This index system saves a lot of space. By default, only one side of face gets rendered. This is useful when you are rendering solid objects. If you want render both sides of face you have to set solid field to FALSE. Counterclockwise order to clockwise order you can change in field ccw.
3.2 The IndexedLineSet
VRML can also draw 1D objects. Lines are drawn with IndexedLineSet node, which is similar to IndexedFaceSet.
IndexedLineSet {
  eventIn       MFInt32  set_color Index
  eventIn       MFInt32  set_coordIndex
  exposedField  SFNode   color            NULL
  exposedField  SFNode   coord            NULL
  field         MFInt32  colorIndex       []
  field         SFBool   colorPerVertex   TRUE
  field         MFInt32  coordIndex       []
}
Points are drawn by PointSet. It is not indexed. You have to put there coordinates by coordinate.
PointSet {
  exposedField  SFNode  color  NULL
  exposedField  SFNode  coord  NULL
}VRML allows you to create worlds, and for worlds you need some land. The ElevationGrid node is a right thing for this purpose.
ElevationGrid {
  field  MFFloat  height      []
  field  SFBool   ccw         TRUE
  field  SFBool   solid       TRUE
  field  SFInt32  xDimension  0
  field  SFInt32  xSpacing    0.0
  field  SFInt32  zDimension  0
  field  SFInt32  zSpacing    0.0
}
Four fields define the grid of points onto which the height map is applied xDimension and zDimension defines count of point in x and z axis. xSpacing and zSpacing defines a distances between this points. Field height defines height of each point in grid.
4. Object Appearance
4.1 Textures
I have shown you how to apply color on object in Material node. But you can also add a texture around the surfaces of the object. Textures are added using the ImageTexture node.
ImageTexture {
  exposedField  MFFloat  url      []
  field         SFBool   repeatS  TRUE
  field         SFBool   repeatT  TRUE
}
The url field has a string, which is the filename of the image, which you want to apply on the object. As a texture you can use GIF of JPEG files. Mapping on each object is different. For example for cube is it one copy of image on each face and for sphere is image wrapped around. Fields repeatS and repeatT allows you to control when the object is larger then image. Normally, if the texture cannot cover the entire object it simply repeats. If you want only a single copy of the texture, you can set repeatS and repeatT to FALSE.
4.2 Transforming Textures
If you don’t like the way that is texture mapped on object you can use TextureTransform node.
TextureTransform {
  exposedField  SFVec2f  center          0 0
  exposedField  SFFloat  rotation        0
  exposedField  SFVec2f  scale           1 1
  exposedField  SFVec2f  transformation  0 0
}
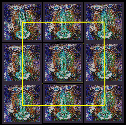
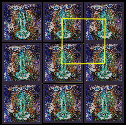
Next picture shows you how is TextureTransform node used.
 |
 |
 |
 |
 |
| original image | simply repeats image | scale 2 2 | translate 0.5 0.5 | rotate 0.78 center 0 0 |
4.3 Changing Text Font Style
For styling text is used FontStyle node.
FontStyle {
  field  SFString  family       “SERIF”
  field  SFBool    horizontal   TRUE
  field  MFString  justify      “BEGIN”
  field  SFString  language     “”
  field  SFBool    leftToRight  TRUE
  field  SFFloat   size         1.0
  field  SFFloat   spacing      1.0
  field  SFString  style        “PLAIN”
  field  SFBool    topToBottom  TRUE
}
Fields family and style are changing a look of the font. They both take SFString value. For font it is SERIF, SANS and TYPEWRITER. For style it is PLAIN, BOLD, ITALIC and BOLDITALIC. In this time is discussion about using all names of font which you are using in your system. Size field does not mean absolute size of characters, but every font has a notation of how tall it must be to look acceptable with lines are spaced at this distance. Spacing is multiplied by size. Field justify allows you to align text. This field cans takes two strings. One for horizontal and one for vertical justification. If you change one of fields horizontal, leftToRight or topToBottom you can change direction of text for vertical, from right to the left and from bottom to top. In language field you can choose language from utf8 standard. (For US English it is en_US, for Chinese it is zh_CN.
5. Using Lights
The human system operates by receiving light reflected by object in the world. Virtual worlds try to mimic the real world as close as possible. It means light too, but calculating every bit of light from every possible source is not practical for real-time rendering. Shortcuts are need. First, the light is computed only for vertexes of the objects. The surfaces are then colored by interpolating colors. Before the color of the vertex can be computed the renderer must know the source of all the possible lights in the scene. Some light is generated by the objects itself (the emissiveColor and ambientIntensity from Material node). But most of the color of the object comes from external lights.
In VRML scene you have your own light. It called a headlight. The headlight is positioned to always look in the same direction as you.
5.1 Simple Lighting
The simplest type of light in VRML scene is the DirectionalLight.
DirectionalLight {
  exposedField  SFFloat  ambientIntensity  0
  exposedField  SFColor  color             1 1 1
  exposedField  SFVec3f  direction         0 0 -1
  exposedField  SFFloat  intensity         1
  exposedField  SFBool   on                TRUE
}
This light hasn’t got a position in scene. It is used for primary light sources (like sun; headlight is made with DirectionalLight too). Light coming from DirectionalLight node takes the form of the parallel rays with directions set up in direction field. Note that the objects don’t block the rays. VRML doesn’t support shadows. Light from this source is inside room with no windows too. To eliminate this effect the DirectionalLight is scoped. It means, that it lights only objects contained in its group.
5.2 Advanced Lighting
PointLight {
  exposedField  SFFloat  ambientIntensity  0
  exposedField  SFVec3f  attenuation       1 0 0
  exposedField  SFColor  color             1 1 1
  exposedField  SFFloat  intensity         1
  exposedField  SFVec3f  location          0 0 0
  exposedField  SFBool   on                TRUE
  exposedField  SFFloat  radius            100
}
PointLight has the same ambientIntensity, color, intensity as the DirectionalLight, but rather then having a direction field it has location field. The scope of PointLight is different from that of the DirectionalLight. Field radius bordered PointLight. The intensity is not same in all distances around location. The rate at with the intensity drops off with distance is controlled by the attenuation field.
The most advanced and compute-intensive, light in VRML is the SpotLight.
SpotLight {
  exposedField  SFFloat  ambientIntensity  0
  exposedField  SFVec3f  attenuation       1 0 0
  exposedField  SFFloat  beamWidth         1.570796
  exposedField  SFColor  color             1 1 1
  exposedField  SFFloat  cutOffAngle       0.785398
  exposedField  SFVec3f  direction         0 0 -1
  exposedField  SFFloat  intensity         1
  exposedField  SFVec3f  location          0 0 0
  exposedField  SFBool   on                TRUE
  exposedField  SFFloat  radius            100
}
It has the same fields as a DirectionslLight and a PointLight plus two new fields. beamWidth is an angle from centerline to the edge of light cone. It defines where the light starts to drop off. cutOffAngle is an angle measured from the centerline. It defines a cone where SpotLight no longer illuminates.
6. Sounds and Anchors
6.1 Ambient Sound
Until now we have created silent worlds. Adding sound to these worlds we will make worlds more interesting. Here are nodes need to make sound in a scene.
Sound {
  exposedField  SFVec3f  direction   0 0 -1
  exposedField  SFFloat  intensity   1
  exposedField  SFVec3f  location    0 0 0
  exposedField  SFFloat  maxBack     10
  exposedField  SFFloat  maxFront    10
  exposedField  SFFloat  minBack     1
  exposedField  SFFloat  minFront    1
  exposedField  SFFloat  priority    0
  exposedField  SFNode   source      NULL
  field         SFBool   spatialize  TRUE
}

AudioClip {
  exposedField  SFString  description  “”
  exposedField  SFBool    loop         FALSE
  exposedField  SFFloat   pitch        1.0
  exposedField  SFTime    startTime    0
  exposedField  SFTime    stopTime     0
  exposedField  MFString  url          []
  eventOut      SFTime    duration_changed
  eventOut      SFBool    isActive
}
For ambient sound you have to set the values in maxBack, minBack, MaxFront and MinFront fields to a very large distance. Set spatialize field to FALSE. To source field goes an AudioClip node, where url holds address of .wav or .midi file. If you set stopTime to –1 playing sound will not stop until you leave the world.
6.2 Sound with Location

MaxFront and MinFront define distances in the direction of the direction field and MaxBack and MinBack in opposite direction. With these parameters you can control a size of the area in which the sound is heard. It forms an ellipsoidal volume of sound, as you can see on the picture. And you have to set up field spatialize to TRUE.
6.3 Anchors
In HTML pages you can click on a highlighted text and be taken to another page. You can also place hyperlinks to VRML worlds. Here is the definition of Anchor node.
Anchor {
  eventIn       MFNode    addChildren
  eventIn       MFNode    removeChildren
  exposedField  MFNode    children        []
  exposedField  SFString  description     “”
  exposedField  MFString  parameter       []
  exposedField  MFString  url             []
  field         SFVec3f   bboxCenter   0 0 0
  field         SFVec3f   bboxSize     -1 –1 -1
}
url field holds information about address where you will go and children holds all shapes, which will react on your double-click.
7. Conclusion
VRML in its latest version 2 is very powerful tool for creating virtual worlds on Web. This was only one third of VRML. If you want to know more about this specification you can find other information at addresses which I gave you in references.
8. References
[1] The VRML 1.0 Specification, http://vag.vrml.org/vrml10c.html
[2] The VRML 2.0 Specification, http://vag.vrml.org/vrml20c.html
[3] Campbell Bruce, Marrin Chris: Teach yourself VRML 2 in 21 days, pp. 20-117, sams.net Indianapolis, 1996.